From delicious pasta dishes to creative vegetable snacks, check out this list of 10 Easy Recipes Perfect For Home Cooking that are perfect for making at home with no fuss whatsoever. Looking for meals that are satisfying and simple to make? Check out this list of 10 Easy Recipes that will have you in and out of the kitchen in no time. From Savory Pasta Dishes to unique and creative vegetable snacks, you won’t be short on great meal ideas anytime soon! Impress your family and friends with delicious meals you create from home! This simple recipe that even beginners can make. Whether you’re a newbie in the kitchen or an experienced chef, these 10 easy recipes will help you create Delicious Meals for you and your family to enjoy. From breakfast to dinner—these recipes are easy to follow, making them great for beginners or busy weeknights!

 Benefits of Cooking Food at Home
Enjoy delicious and balanced meals with fewer calories and more nutrition when you cook at home! Read on to learn some of the surprising Benefits of Cooking Food at Home.
Cooking meals at home can offer a variety of advantages for your health, your budget, and your palate. From gaining more control over the quality of ingredients you use to saving money on restaurant bills, there are many Benefits to Cooking Food at Home. Learn more about the surprising advantages cooking can provide and how to make it a regular part of your routine.
Turn your home kitchen into an entertaining and nutritious environment by discovering the amazing benefits of cooking your own food. Here’s how!
Cooking at home has many benefits, from enhancing your culinary skills to giving you control over what ingredients go into your meals. Not only can making your own food more nutritious and cost-effective, but it also provides a creative outlet for those looking for something fun to do in the kitchen.
Plan and Prep: Create an organized plan and shopping list before heading to the grocery store.
Formulating a plan of attack and shopping list before you head to the store can save valuable time and money when it comes to cooking. With your plan in hand, you’ll be able to easily select ingredients that are necessary for the recipes you want to make. Having an organized list is also helpful for reducing food waste since you’ll only buy what you need and know what meals you will be cooking with them.
Make It Fun: Invite your friends or family over, put on some upbeat music, and make it into an event!
Inviting friends or family over for meals is a great way to make cooking enjoyable and social. You can use the time to encourage each other to find healthy recipes, swap cooking tips, or even try out new ingredients that none of you have cooked with before! Playing some upbeat music in the background will add a cheerful vibe and make it more entertaining.
Experiment: Don’t be afraid to try out new recipes or substitute ingredients depending on preference or availability.
Experimenting with recipes is a great way to make cooking a fun activity. Don’t be afraid to try out new things, because it can lead to unexpected yet delicious combinations! For instance, if you’re craving something warm and comforting, you could try replacing white potatoes in a recipe with sweet potatoes or quinoa. Or perhaps instead of beef, some boneless chicken breasts or fish fillets would make your meal a little healthier. The possibilities are endless!
Educate Yourself: Use cookbooks, blogs, or YouTube tutorial videos to further develop your cooking skills.
Make use of cookbooks, blogs, and YouTube tutorial videos to explore new recipes and techniques. Educate yourself on the basics or challenge yourself with gourmet dishes you never could have imagined. You might even find some interesting food science facts along the way! Read up on important nutrition topics like macronutrients and vitamins, utilizing the knowledge you gain to supercharge your dishes with health benefits. Take advantage of these resources to get greater enjoyment out of your meals – for both cooking and eating.
Stay Healthy: Utilize healthy cooking techniques such as baking instead of frying and using oils with healthy fats like olive oil instead of butter.
Different cooking techniques can make a significant difference in the nutritional value of your meals. For example, baking is usually a healthier alternative to frying because it requires less oil and produces fewer calories than fried dishes.
In addition to selecting healthy cooking techniques, use ingredients that are nutritious and rich in beneficial fats such as olive oil or avocado oil. Doing so will ensure that your meals are not only delicious but also healthy for you and your family.
Exploring the Difference Between Restaurant Foods vs Home-Cooked Dishes
Learn how restaurant dishes compare to home-cooked meals in this interesting article on the Difference Between Restaurant Foods and Homemade Cuisine.
Eating in a restaurant can be a great treat, but it doesn’t always measure up to the tastes and nutritional value of home-cooked meals. In this article, we’ll compare the differences between restaurant foods and homemade cuisine, so you can decide which is best for your family.
Understand the Difference in Ingredients & Preparation Techniques.
Restaurants typically have access to more extravagant ingredients, as well as specialized cooking methods, like sous vide and liquid nitrogen. Home cooks are limited to ingredients they can buy at the grocery store and basic cooking methods.
Restaurant chefs also tend to season foods with more salt than home cooks do since seasoning enhances the flavor in a way that consumers expect when dining out.
Additionally, restaurants often rely on shortcuts such as using pre-made sauces or ready-made pastries rather than making everything from scratch.
Compare Restaurant Dishes vs Home-Cooked Meals in Taste, Portion Size, Cost, and Time Required.
Restaurant meals often have a deep, complex flavor that can be hard to recreate at home. Home-cooked meals can normally be balanced better, with spices and seasonings adjusted as one goes.
Portions in restaurants are usually much larger than homemade dishes, so if you’re trying to save money or calories this can be an important consideration.
Home-cooked meals also require more time since ingredients must be purchased at the grocery store and preparations may take longer. Depending on the meal, costs could also vary significantly between restaurant dishes and home-cooked versions.
Learn How to Repurpose Leftovers from Restaurant Visits into Delicious Home-Cooked Dinners.
Restaurant leftovers can often be repurposed into tasty home-cooked dishes. With a few extra ingredients and some creative thinking, you can turn your leftovers into something nutritious and delicious. For example, if you have some leftover steak, you could try adding it to a stir-fry with some veggies, or make tacos out of it!
If there are enough leftovers to save for another meal, try freezing them right away so that they will stay fresh for later. Remember, the limit is your imagination when it comes to reusing restaurant leftovers in flavorful home-cooked meals.
Evaluate the Pros and Cons of Eating Out Versus Making Home-Cooked Food.
Eating out is often more convenient than cooking a meal at home. With the rise of fast-casual restaurants and delivery options, ordering takeout has never been easier.
Eating out can also give you access to food and flavors that you may not be able to make in your own kitchen. On the other hand, making food from scratch gives you control over the ingredients and is often healthier as well as more budget-friendly.
Consider the pros and cons of both when making decisions about meals in order to make choices that best suit your tastes, budget, and lifestyle.
Discover Tips for Reducing Waste When Dining Out or Cooking at Home.
Whether you’re dining out or cooking at home, there are a few things you can do to reduce food waste. When dining out, request smaller portion sizes or ask for ‘doggy bags’ to take the rest of your meal home.
Cooking at home? Source ingredients that have been grown with sustainable practices and save any leftovers for another day. Composting food scraps is also an easy way to process food waste and can turn it into something useful instead of simply throwing it away.
10 Easy Recipes to Make at Home
We discovered the top ten Simple and Easy Recipes to make at home, each with 5 Ingredients or less and cooking times of 30 minutes or less. So let’s get started with our 10 easy recipes to make at home with the most delicious and yummiest taste ever.
Delicious Trout Cooking Recipe – Step-By-Step Guide
Have a craving for trout? Get the skills you need with this instructional cooking recipe! A perfect dish every time with this simple and delicious trout recipe.
If you’re in the mood for a delicious and nutritious meal, look no further than this easy-to-follow recipe for cooking trout. With few ingredients and quick prep and cook time, this tender fish dish is sure to be a hit with your family and friends.

Prepare the Trout: Clean and Gut the Fish.
Before you can cook the trout, you need to properly prepare it. Start by gutting and cleaning the fish. Rinse both the interior and exterior with cold water then pat dry with a paper towel. With a sharp knife, slice opens the belly of the trout and remove all organs, including gills and intestines, by pulling them out gently. Discard all internal organs into a disposal bin or outdoor garbage bin.
Prepare the Marinade: Mix Spice Mixture Together.
In order to bring out the flavors of your delicious trout, create a spicy marinade. Start by combining garlic powder, salt, black pepper, lemon juice, olive oil and paprika in a bowl and stir until fully combined. For an extra kick of flavor, add some cayenne pepper or crushed red pepper flakes to the mix. Stir until all the ingredients are distributed evenly throughout for the perfect blend of spice.
More Trout Cooking Recipes That Everyone Will Love
Preparing to Cook: Preheat Oven and Grease a Baking Tray.
Now that your marinade is ready, it’s time to heat up the oven and grease up a baking tray. Preheat the oven to 375°F before greasing the baking tray with butter or oil. Once the oven is preheated and the baking tray has been greased, place each trout fillet on top of it. Make sure to spread out each fillet evenly so they don’t overlap with one another. Then spoon the marinade over each of them.
Cooking Instructions: Bake Trout at 375°F for 15-20 Minutes.
Start by baking the trout in the oven for 15-20 minutes. Once it’s done, you can tell if the trout is cooked through if a knife inserted into the fish enters easily. When it’s done, you’ll want to remove each fillet from the oven and let it cool for 3-4 minutes before serving. Serve with fresh lemon wedges or your favorite accompaniments!
Presentation: Serve with Lemon Wedges and Herbs on Top.
Present your trout meal with beautiful lemon wedges, fresh herbs such as thyme or tarragon, and a sprinkle of sea salt. For an extra touch, try adding a drizzle of olive oil on top for a more robust flavor. The aromatic lemon and herb combination will brighten any plate and adds the finishing touches to a delicious trout dish.
Easy as 1,2,3 – Unbelievable Chicken Dinner Recipe
Have dinner ready in minutes! Learn to make an easy, unbelievably Delicious Chicken Dish with just 3 ingredients and 5 simple steps.
Craving a delicious, comforting meal without all the fuss? Look no further: this easy chicken recipe requires just 3 ingredients and only 5 simple steps for an unbelievably tasty dinner—ready in minutes!

Prepare the Ingredients.
For this recipe, you will need two boneless skinless chicken breasts, one can of cream of chicken soup, and a quarter cup of shredded cheese. Make sure to season the chicken with salt and pepper before cooking it. Then, preheat the oven to 350 degrees F (175 degrees C).
Preheat the Oven.
To start off this recipe, preheat the oven to 350 degrees F (175 degrees C). Make sure the oven is up to temperature before you begin assembling the dish. This will ensure that the chicken cooks evenly and comes out nicely browned and delicious.
Brand and Assemble The Chicken.
Begin by patting your chicken dry, then season it with salt and pepper to taste. Next, open the can of diced tomatoes and spread them across the bottom of a 13×9-inch baking dish. Place the chicken breasts on top of the tomatoes, covering the entire surface area. Finally, open the package of grated cheese and sprinkle it evenly over the chicken breasts. Put the baking dish in the oven and let it cook for 35 minutes or until a thermometer inserted into one of the chicken breasts reads 165 degrees F (74 degrees C).
More ways to cook Unbelievable Chicken Dinner Recipe (Read More..)
Bake Until Juices Run Clear.
When the chicken has baked for 35 minutes, take out the dish from the oven and insert a thermometer into one of the breasts. The internal temperature should read 165 degrees F (74 degrees C). If it’s not there yet, continue to cook for an additional 5 minutes or until all the juices run clear when pierced with a fork. Once cooked, take out the dish from the oven and let it cool for a few minutes before serving. Enjoy!
Serve with Your Favorite Sides.
While this chicken is delicious and simple on its own, it pairs perfectly with a variety of sides. Serve it up with steamed vegetables like carrots, broccoli, or asparagus, mashed potatoes and gravy, cooked wild rice or quinoa, stuffing, crackers and cheese, salads, or your favorite store-bought side dish. Have fun experimenting to find the perfect accompaniments for your easy chicken dinners!
Quick & Easy Tomato and Mozzarella Pasta Bake – 4 Ingredients!
Make your pasta night even simpler with this quick and Easy Tomato and Mozzarella Pasta Bake! A hearty dinner made from just four ingredients, ready in no time.
Make dinner time easier and more delicious with this 4-Ingredient Tomato and Mozzarella Pasta Bake. With only four ingredients and less than 30 minutes of preparation time, you’ll have a savory, creamy dish that will satisfy the hungriest bellies.

Gather ingredients.
To get started, you’ll need rigatoni pasta, canned tomato sauce, small mozzarella balls (also called ciliegine), and a handful of fresh herbs such as basil, parsley or oregano.
Once you’ve gathered all the ingredients together, preheat your oven to 375℉ (190 ℃). Then you can begin preparing the pasta bake!
Cook the pasta according to package directions.
Begin by cooking the rigatoni in salted boiling water following the instructions given on the packet. Make sure not to overcook it or the pasta bake will end up soggy. Once cooked, drain off the water and rinse briefly to cool down the pasta then return it to the pot.
Preheat oven to 375°F.
Preheat your oven to 375°F and lightly grease a 9×13 inch baking dish with 1 tablespoon of olive oil.
Add the cooked rigatoni to the dish along with some chopped cherry tomatoes, and a generous sprinkle of grated mozzarella cheese. Gently mix everything together until combined and spread it almost evenly in the pan.
Different styles of Healthy Tomato and Mozzarella Pasta Bake for Two try this also
Assemble and bake the dish.
Once the pasta is mixed with all the ingredients, spread it evenly in the dish. Drizzle with 1/4 cup of olive oil then sprinkle with some freshly ground black pepper.
Place it in the preheated oven and bake for 30 minutes until golden and bubbly. Let cool slightly before serving and enjoy!
Serve and enjoy!
This pasta bake is best served right out of the oven, while it’s still hot and melty. Serve with some freshly chopped basil for added flavor.
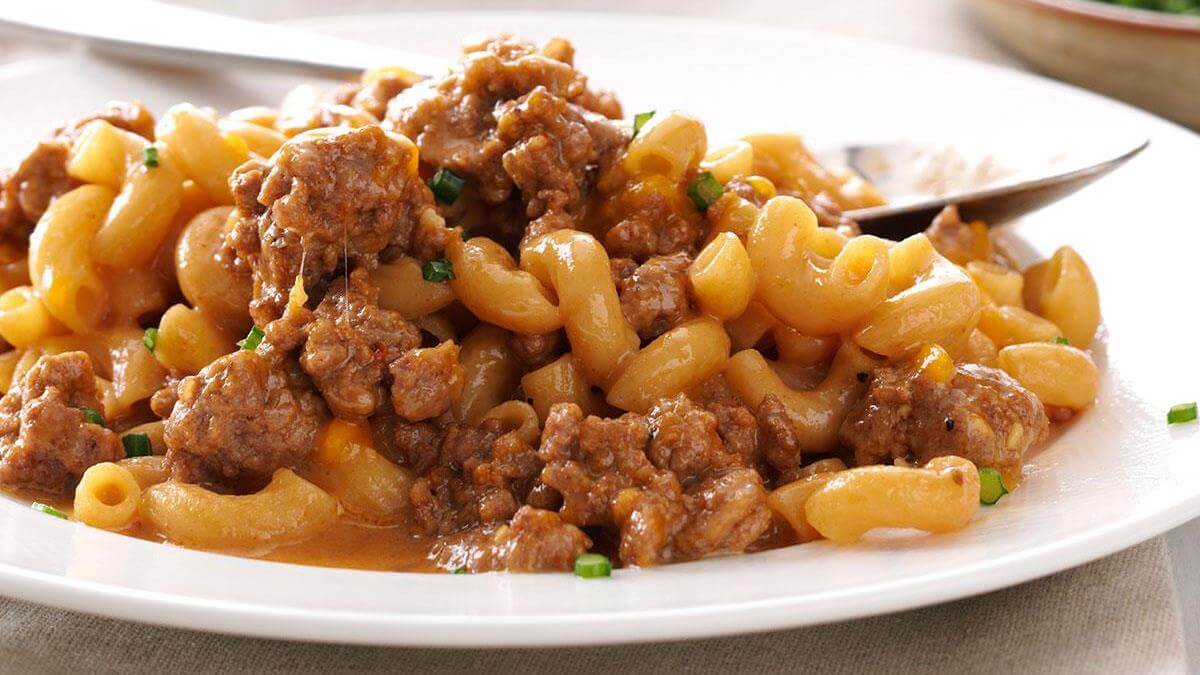
Cheeseburger Macaroni Skillet – A Quick and Easy One-Pot Meal
Ready to make a quick and easy meal in one pot? Try this delicious Cheeseburger Macaroni Skillet! It’s a kid-friendly, creamy dish that everyone will love.
Craving a tasty, comfort food dinner but don’t feel like spending hours in the kitchen? Look no further than this quick and easy Cheeseburger Macaroni Skillet! It’s a creamy, kid-friendly dish that will have your family asking for seconds.
The ingredients to gather.
To make this Cheeseburger Macaroni Skillet, you’ll need one pound of ground beef, a half-pound of macaroni elbows, onion, garlic, a can of Rotel diced tomatoes and green chilies, chicken broth, Worcestershire sauce, cheddar cheese, cream cheese, red pepper flakes, and salt. With these ingredients ready to go, you can easily whip up a delicious family meal in just minutes!
Brown the beef and seasonings.
To begin, brown the ground beef with the diced onion and garlic in a large skillet over medium-high heat. Once fully cooked, season it with red pepper flakes, Worcestershire sauce, and salt. Stir everything together until everything is well mixed.
Now you’re ready to add the rest of the ingredients and make your Cheeseburger Macaroni Skillet!
Add the pasta, broth and tomatoes with chilies.
Once the ground beef is cooked and seasoned, add the uncooked rotini pasta and stir to combine. Then, pour in two cups of chicken or vegetable broth along with a can of diced tomatoes with green chilies.
Bring everything to a simmer and let it cook until the pasta is tender, stirring occasionally – about 16-18 minutes.
We have also made A Family Favorite Cheeseburger Macaroni Skillet (Cook Now..)
Simmer until the macaroni is done cooking.
After pouring the broth and diced tomatoes into the skillet, let everything come to a simmer. Stir occasionally until the Macaroni is cooked through and most of the liquid has been absorbed – about 16-18 minutes.
When it’s done cooking, sprinkle with a few handfuls of freshly grated cheese before serving. Enjoy!
Stir in cheese and let melt before serving.
To finish off the dish, all you need to do is stir in a few handfuls of your favorite cheese. Let the cheese melt for a few minutes before serving the Cheeseburger Macaroni Skillet.
This creamy and delicious meal can easily be made ahead of time and refrigerated or frozen for later meals. Enjoy!
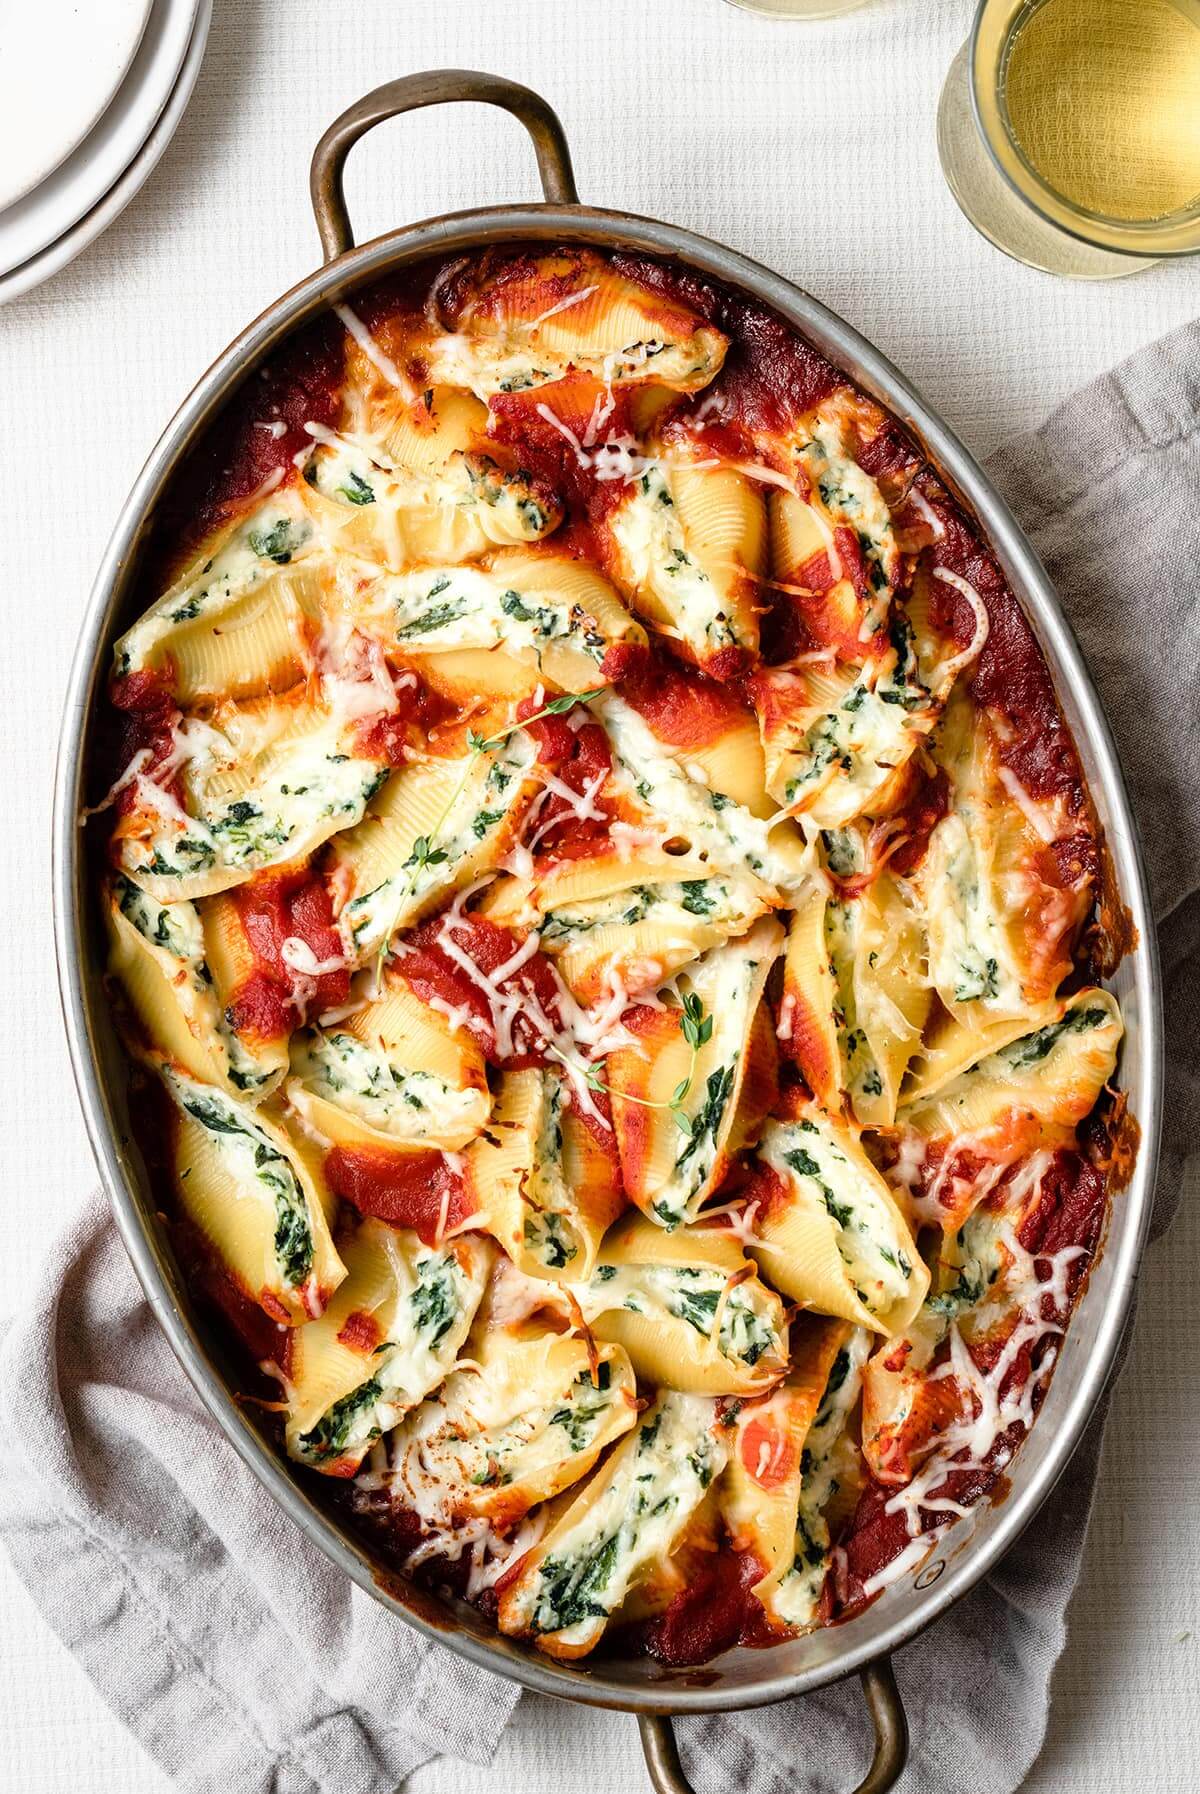
Spinach and Parmesan Stuffed Shells – An Easy Weeknight Meal
Make your weeknights easier with this quick and delicious dish – Spinach and Parmesan Stuffed Shells! A simple yet tasty meal that can be made in minutes.
Make your weeknights easier with this delicious and quick dish – Spinach and Parmesan Stuffed Shells! This simple, yet tasty meal can be made in minutes and is sure to please even the pickiest of eaters.
Gather the ingredients:
Jumbo pasta shells, ricotta cheese, baby spinach, parmesan cheese, garlic cloves and salt & pepper.
To make your Spinach and Parmesan Stuffed Shells, you will need jumbo pasta shells, ricotta cheese, baby spinach, parmesan cheese, garlic cloves, salt and pepper.
Start by preheating oven to 375 degrees Fahrenheit and boiling a pot of salted water. Cook the shells in boiling water according to package directions until they are slightly tender but still firm. Drain them and set aside while you prepare the filling.
Preheat your oven to 350 degrees F (175 degrees C).
Preheat your oven to 350 degrees F (175 degrees C). Mix the ricotta, parmesan cheese, spinach, minced garlic cloves and salt and pepper together in a bowl until well blended. Grease a 9×13 inch baking dish.
Fill each shell with the cheese mixture and place them in the baking dish. Sprinkle some more parmesan cheese over the shells. Bake for 20-25 minutes until shells are bubbling and cheese is melted. Serve warm. Enjoy!
This way also you can also cook Spinach and Parmesan Stuffed Shells
Cook the stuffed shells in a large pot of boiling salted water until al dente.
Bring a large pot of lightly salted water to a boil. Add the shells and cook for 8 minutes; drain. Lay each shell flat on a cutting board or counter and place 2-3 tablespoons of the cheese mixture inside each shell.
Fit as many stuffed shells into the 9×13 inch baking dish as possible. Once all the shells are filled, drizzle with olive oil and top with the remaining parmesan cheese.
Meanwhile, mix together the ricotta cheese, baby spinach, parmesan cheese and minced garlic cloves in a medium bowl.
In a medium bowl mix together 1 cup ricotta cheese, 2 cups baby spinach (roughly chopped), 1/4 cup parmesan cheese (plus more for the topping) and 2 minced garlic cloves. Stir until combined and set aside.
Spinach and Parmesan Stuffed Shells for Weeknight Dinners
Prepare a baking dish by lightly greasing it with oil or butter then spread one cup of marinara sauce on the bottom of it.
Boil 1 pound of jumbo shells according to package instructions (typically 9-12 minutes) until al dente then rinse with cold water and drain.
Stuff each shell with a small spoonful of the spinach mixture then place in the baking dish. Once you’ve stuff all of your shells, top them with remaining marinara sauce and sprinkle with parmesan cheese. Bake at 350F for 25 minutes or until bubbly. Enjoy!
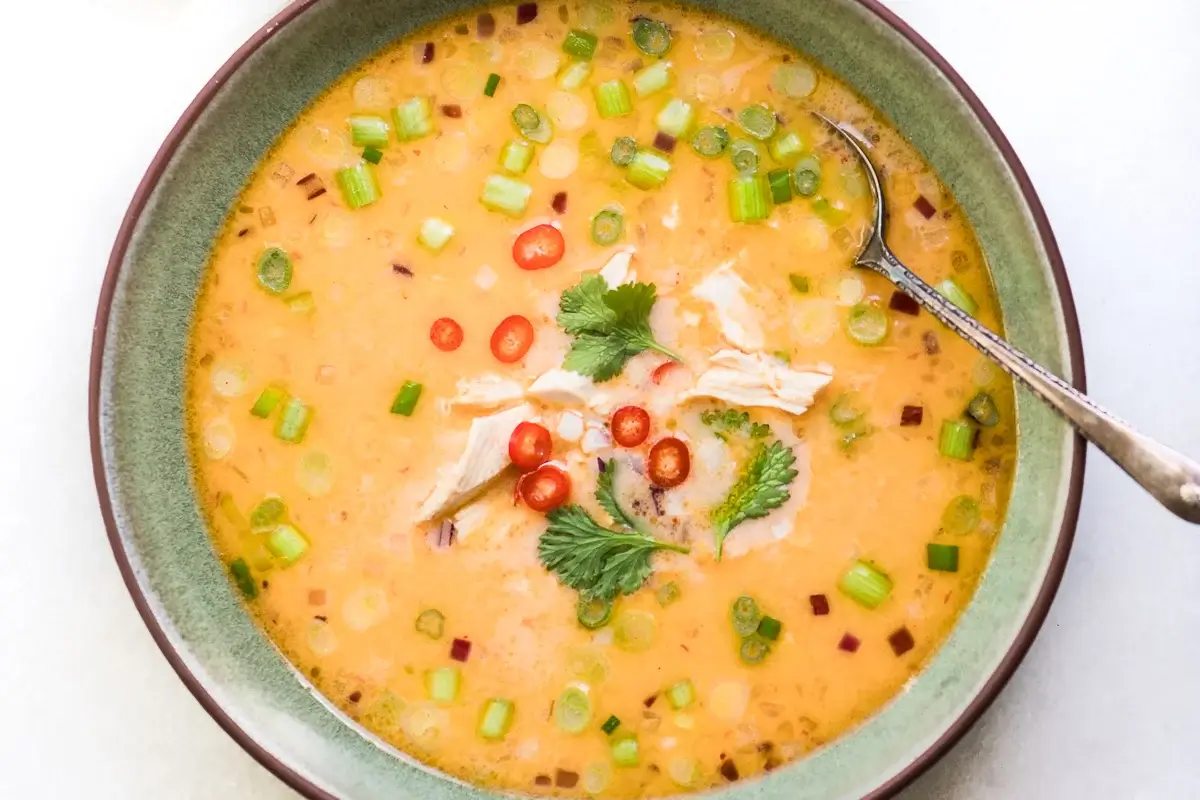
Aromatic Thai Coconut Soup – The Perfect Comfort Food!
Get cozy with this aromatic Thai Coconut Soup! A delightful combination of fragrant spices, creamy coconut and some optional meat make this a comforting meal the whole family will love.
Bring the exotic flavors of Thailand to your kitchen with this delicious Thai Coconut Soup! Filled with a combination of fragrant spices, creamy coconut and optional meat, this comforting soup is sure to satisfy everyone’s taste buds.
Gather Ingredients.
To make this soup, you’ll need a few key ingredients. Start by gathering the spices: red curry paste, coriander powder, fish sauce and garlic.
In addition, you’ll need light coconut milk (or coconut cream for a richer flavor), chicken broth and diced chicken (optional). Finally, top your soup with some cilantro leaves and freshly squeezed lime juice to bring out the aromatic Thai flavors.
Sautee Aromatics and Spices.
The first step to making this delicious Thai soup is to sautée some of the key ingredients. Add a tablespoon of oil to a large pot and heat it over medium-high heat.
Then, add garlic, red curry paste, coriander powder and fish sauce. Stir these around for a minute or two until the mixture is fragrant and fully combined.
Simmer the Soup.
Once your aromatics are cooked, add in the broth, coconut milk, and any additional vegetables and proteins of your choosing. Stir everything together and bring it to a simmer.
Reduce the heat to low, partially cover the pot and let the soup cook for 10-15 minutes until all of the flavors come together. Taste and adjust with more fish sauce or an extra sprinkle of coriander if needed.
Rich and Filling Thai Coconut Soup That’s Guaranteed to Satisfy (read more)
Add in Meat (if desired).
If you would like to add some protein to your Thai Coconut Soup, now is the time. Chicken, shrimp, or pork are common additions and will provide a wonderfully flavorful base for the soup.
Simply add in the meat of your choice and cook it through in the pot before continuing with the recipe. Make sure the meat is cooked through before adding the coconut milk and finishing up!
Blend the Soup for Creamy Texture.
Once everything is in the pot, you have one more step to take before digging in. Use an immersion blender (or regular blender) to blend the soup together until it’s creamy and smooth.
The coconut milk will make the consistency of your Thai Coconut Soup really rich and luxurious. Make sure to blend it enough so that all of the flavors meld nicely, it should only take a few minutes.
Heavenly Peanut Butter Chocolate Chip Brownies — Easier Than Pie!
Make Mouth-watering Brownies with a few ingredients and just minutes of effort! Enjoy indulgent peanut butter and chocolate chip combo without the fuss of baking a pie.
Sweet tooth cravings can often be satisfied with the simplest of recipes. These delicious peanut butter and chocolate chip brownies are no different – they require only minimal effort and a handful of simple but delicious ingredients to make.
Get ready for a truly indulgent treat that’s sure to hit the spot!

Prepare Your Ingredients.
Before you get started, gather the ingredients for these heavenly peanut butter and chocolate chip brownies. You’ll need butter, white sugar, brown sugar, eggs, vanilla extract, all-purpose flour, baking powder and salt.
For the delectable chocolate and peanut butter topping you’ll want to pull out some semi-sweet chocolate chips and creamy peanut butter. Now that you have everything on hand, it’s time to start baking!
Mix the Batter and Bake.
In a medium-sized bowl, mix together the melted butter, white sugar, and brown sugar. Add to this the eggs and vanilla extract and stir until everything is nice and creamy.
To this add the flour, baking powder and salt and mix until everything is combined. Pour this batter into a greased 8×8-inch pan and spread it out evenly.
Sprinkle the semi-sweet chocolate chips over the top of your batter. Now bake in preheated oven at 350°F for 35 to 40 minutes, or until a toothpick inserted into the center comes out clean.
Don’t Overbake!
It’s important not to overbake these brownies, as they could come out dry. To ensure you don’t over-bake them, set your timer for 35 minutes and keep checking the brownies in 5 minute intervals until a toothpick inserted into the center comes out clean.
The brownies may not look golden when done but will firm up as they cool. Once the toothpick test is passed, remove your peanut butter chocolate chip brownies from the oven straight away.
Try our Best Ever Peanut Butter Chocolate Chip Brownie Recipe
Decorate as Desired.
Now, the fun part begins! When your brownies have cooled down, you can take your creative side out to play and decorate them however you want.
Put a scoop of ice cream on top, drizzle caramel sauce or even chocolate hazelnut spread over them for an extra extraordinary gourmet-style treat.
Sprinkle some powdered sugar, mini chocolate chips or dark chocolate shavings – whatever suits your taste buds in the best way. Get creative and have fun!
Enjoy Delicious Brownies Anytime!
These delectable peanut butter and chocolate chip brownies create marvelous memories with family and friends all year long. They are definitely a crowd-pleaser giving everyone, especially chocolate lovers, the most delightful taste experience.
Make them for special occasions and gatherings or just because it’s Tuesday — you’ll always have a heavenly treat to enjoy!
Slow Cooker Salsa Chicken – Perfect Comfort Food
Get ready to curl up with a bowl of warm and comforting salsa chicken – made easily in your slow cooker! Enjoy the perfect mix of spices and flavors with minimal clean-up required.
Looking for an easy weeknight dinner? Try this delicious salsa chicken slow cooker recipe! Combining the perfect mix of spices, flavors, and ingredients, this tasty dish will satisfy your hunger without taking up hours of your time.

The Ingredients.
Before you get cooking, make sure you’ve gathered all the necessary ingredients.
You’ll need 3 pounds of boneless, skinless chicken breasts, 1 cup of your favorite salsa, 1 teaspoon each of chili powder and garlic powder, ½ teaspoon of onion powder, and salt and pepper to taste.
Toss these all together in your slow cooker and you’re one step closer to enjoying this family favorite.
Place Ingredients in the Slow Cooker.
Place the chicken breasts at the bottom of your slow cooker. Pour salsa on top and sprinkle with chili powder, garlic powder, onion powder, salt and pepper. Cover your slow cooker and then set it on low heat for 6 hours or high heat for 3-4 hours. When done cooking, shred chicken with two forks and stir to combine ingredients. Enjoy served with a side dish or over rice!
Set to Low Heat and Cook.
Once the salsa chicken is prepared and ready to go, set your slow cooker on low heat for a longer-cooking option that will create perfect, tender pieces of chicken.
This will take around 6 hours, but you can also do this on high heat for a quicker option – about 3-4 hours! Set a timer for either cooking option to be sure your salsa chicken cooks evenly.
Shred the Chicken and Serve in Taco Shells or Burritos.
Once your chicken has cooked, you can easily shred it with two forks and add it to tacos, burritos, or bring the flavor front and center by enjoying the delicious salsa chicken on its own.
The possibilities are endless when you open up your slow cooker! You can pair this meal with some warm tortillas and a dollop of sour cream for a quick weeknight dinner or a larger family gathering.
Garnish with Sour Cream, Lettuce, and Cilantro for More Flavor!
If you want the perfect finish to your slow cooker salsa chicken, add a dollop of sour cream, some crispy lettuce, cilantro ,and some lime wedges on top.
The coolness and creaminess of the sour cream combined with the acidity of the lime juice contrast perfectly with the smokiness of your pre-cooked salsa chicken for an extra bit of texture and flavor.
Serve as is or include inside tacos, burritos, salads – or just eat it straight outta the bowl!
A Classic Recipe For Chicken Cordon Bleu
Give your dinner guests something to remember with this Classic Recipe for Chicken Cordon Bleu! Savory chicken, ham, and cheese combined to make a mouthwatering meal.
Looking for a delicious and classy dinner dish to impress your dinner guests? Chicken Cordon Bleu is an easy-to-make classic meal, featuring succulent chicken wrapped around flavorful ham and cheese.
Try this recipe today and watch as everyone at your dinner table enjoys every bite!

Prep the Ingredients.
Before you start preparing the Chicken Cordon Bleu, it’s important to gather and prepare all of your ingredients.
Make sure all of these ingredients are readily available so that you have everything you need when it comes time to cook!
Pound the Chicken Breast.
Begin by pounding your chicken breasts to an even thickness. You may need to use a zipper bag or sheet of wax paper to keep the chicken in place while pounding with a meat mallet.
This ensures that all pieces of the Chicken Cordon Bleu will cook evenly, so it’s important not to skip this step!
Place in Filling Ingredients.
Lay out your three pieces of chicken on your workspace top and start adding to them the savory filling. Start by laying a slice of ham on each piece, followed by parmesan cheese, mozzarella or swiss cheese, and seasonings of your choice.
Finally, roll up each piece and secure with a toothpick. Make sure toothpicks are removed before serving!
Prepare Breading Station and Bread Chicken.
To prepare the coating station, mix 1/2 cup all-purpose flour, 1/2 teaspoon each of garlic powder and onion powder.
Dip each cordon bleu piece in your favorite egg wash, then drop it into the breading mixture, lightly coat either side of the chicken with breading.
Finally, place chicken pieces in a greased baking dish.
Cook the Chicken Cordon Bleu.
Place chicken pieces in your preheated oven and bake for 25-30 minutes, or until chicken is golden brown and cooked through.
Use a kitchen thermometer to make sure the thickest parts of the chicken pieces reach 165°F. To get extra crispiness on the outside of this classic dish, set your oven to broil for the last 5 minutes of cooking time.
Enjoy your Delicious Chicken Cordon Bleu!
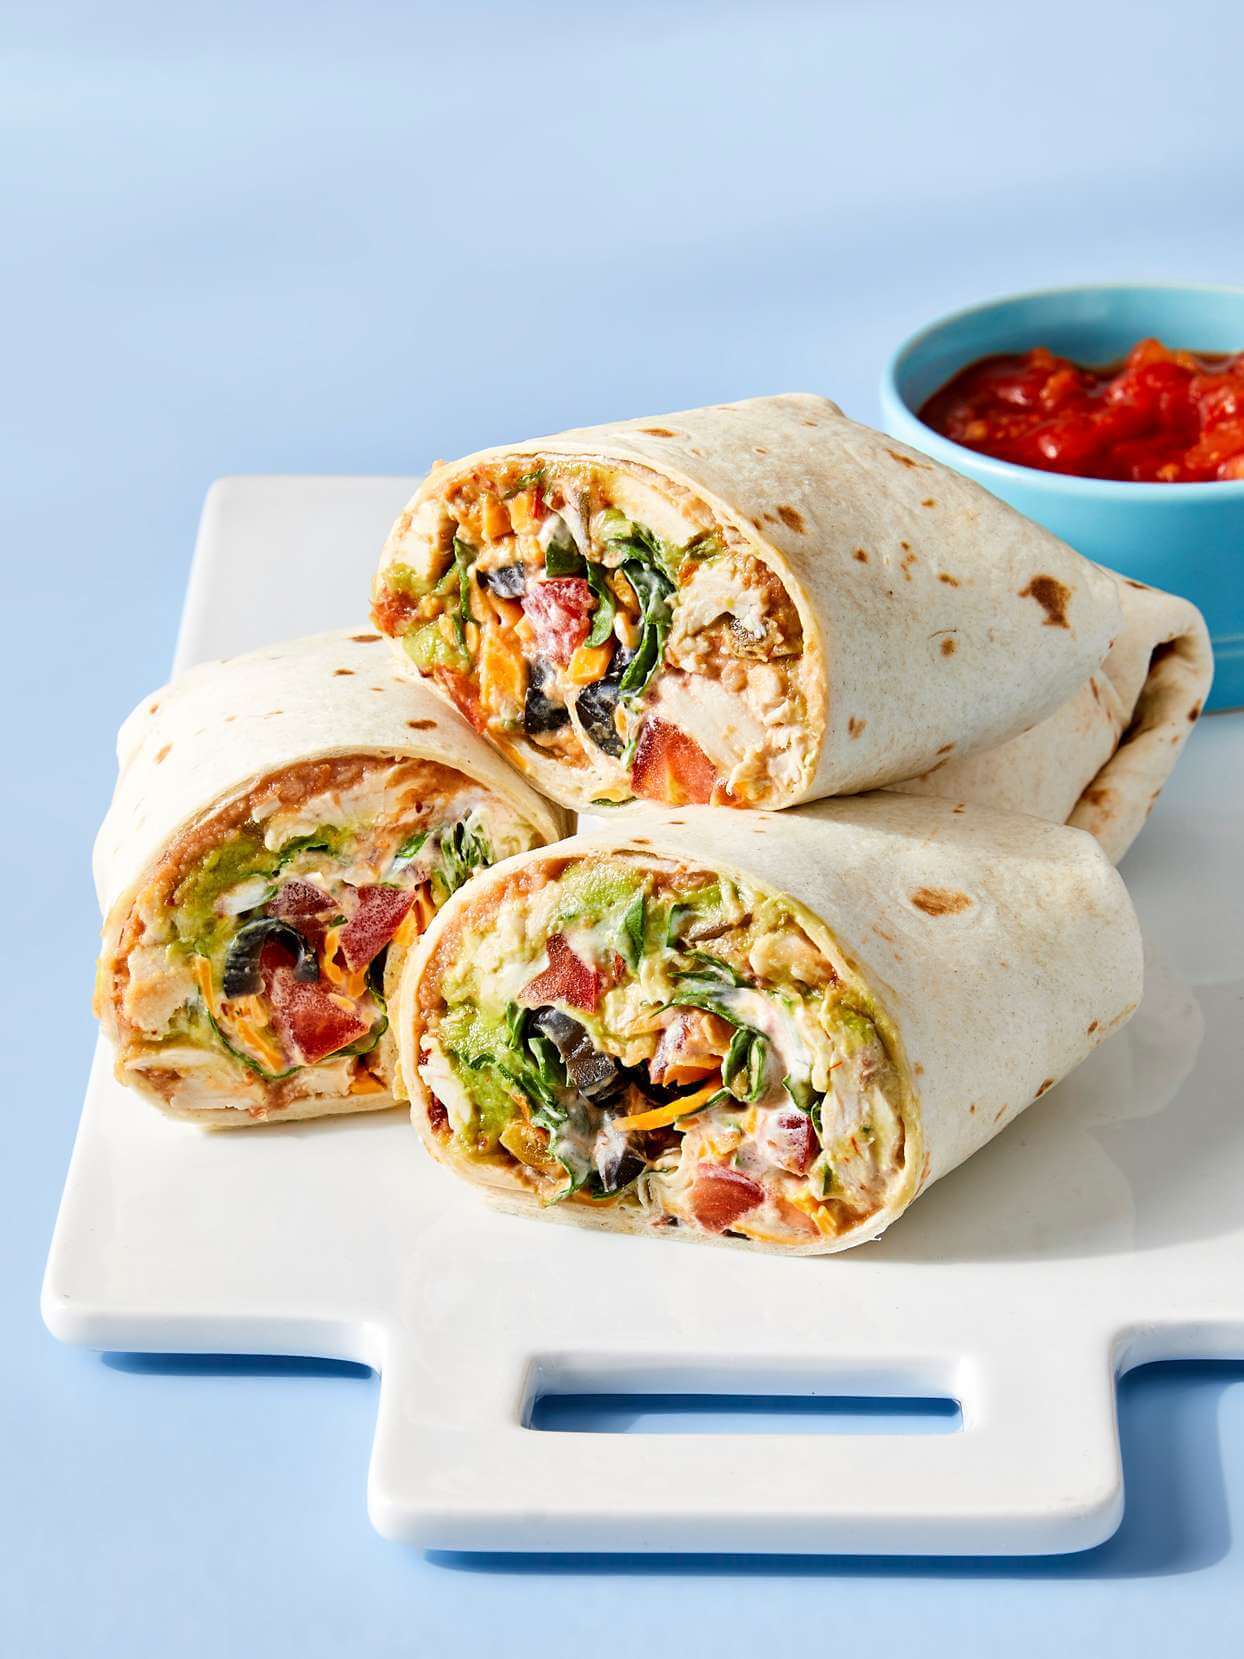
The Best Chicken Burrito Recipe – Made with Tender, Juicy Pieces
Try the best chicken burrito recipe and make amazing burritos with juicy, tender pieces of chicken. Learn how to easily make this delicious dish!
Get ready for a delicious treat with this easy-to-make chicken burrito recipe! It combines juicy, tender pieces of chicken with flavorful ingredients such as tomatoes, onions, garlic, cilantro and spices to create the perfect burrito filling.
Gather the Ingredients Needed.
To make this amazing chicken burrito, gather the following ingredients needed: 1 pound of boneless, skinless chicken breasts, 1 cup shredded cheddar cheese, 1 cup diced tomatoes, 1/2 cup diced onions, 2 cloves garlic peeled and minced, 1/4 cup chopped fresh cilantro leaves, 2 tablespoons olive oil, 1 teaspoon ground cumin and Salt and pepper to taste.
Cook The Chicken Pieces.
Heat 1 tablespoon of olive oil in a large skillet over medium-high heat. Once the oil is hot, add the chicken breasts and season with salt and ground cumin.
Cook for 5-7 minutes or until the chicken is cooked through. Remove the chicken from the heat, shred finely and set aside. Heat an additional tablespoon of olive oil in the same skillet over medium heat.
Add onions, garlic, and diced tomatoes and sauté until everything is nice and fragrant, about 2 minutes. Mix in the shredded chicken and cook for an additional 2-3 minutes stirring frequently.
Finally, add fresh cilantro leaves and season generously with salt and pepper to taste.
Prepare the Burrito Filling.
To make the burrito filling, warm up the refried beans in a small pot over low heat. Once the beans are hot, spoon them into a medium bowl and mash with a fork.
Next, add the shredded chicken mixture to the mashed beans. Taste and adjust seasoning if necessary. Divide the burrito filling into 4 equal parts and set aside until ready to assemble your burritos.
Assemble The Burritos.
Begin by laying out your four large tortillas on a large flat surface. Distribute the burrito filling across each of the tortillas. Then, sprinkle shredded cheese over the top of each one and fold two sides inward towards the center.
Roll up each burrito tightly, tucking in all sides as you roll it to create neat bundles. Serve warm and enjoy!
Bake and Serve The Burritos.
To make the burritos even more delicious, you can heat them in your oven by baking at 350°F for 15 minutes. Be sure to place the burritos on a parchment-lined baking sheet and spray the tops lightly with oil so they get nice and crispy.
Right before serving, top each one with salsa, diced tomatoes, cilantro, and whatever other toppings you like. Enjoy your homemade chicken burrito!
Simple and Delicious Egg Sandwich Recipe
From breakfast to lunch, this delicious Egg Sandwich Recipe will be sure to satisfy even the pickiest of eaters. Go from ordinary to extraordinary with just a few simple steps!
From hearty breakfasts to delicious lunches, you can make an egg sandwich with just a few ingredients and some simple instructions. This easy-to-follow recipe is sure to please even the pickiest of eaters and turn a humble meal into something extraordinary!

Gather Ingredients.
Before you start cooking, make sure you have all of the ingredients needed for your egg sandwich. This includes two pieces of toast, one egg, butter or margarine, salt and pepper, any additional optional toppings such as cheese or bacon.
Once you have all of these items on hand, it’s time to get cooking!
Heat Skillet and Cook Eggs.
Begin by heating a skillet over medium heat. Add butter or margarine to the skillet and crack one egg in it. Use a spatula to scramble the egg as it cooks, stirring regularly.
Season with salt and pepper if desired, then cook until the eggs are done, approximately 4-5 minutes. Serve on two pieces of toast with additional toppings of your choice. Enjoy!
Assemble Sandwich
To assemble the sandwich, spread your favorite condiments on both pieces of toast. Place cooked egg onto one slice and top with other slices of toast. Slice in half and serve immediately. Enjoy!
Toast-Bread & Spread Toppings
Begin by toasting your desired type of bread. Butter or extra-virgin olive oil could also be used for a flavorful twist. Slather on some condiments like mayo or mustard, adding chopped vegetables like lettuce or tomato for added nutrition and flavor.
Enjoy Your Delicious Egg Sandwich!
Once your desired condiments and vegetables have been added, fry an egg in a greased skillet until golden brown. Carefully place your egg between the slices of toasted bread before slicing and serving.
Enjoy your delicious sandwich with your favorite hot sauce or extra condiment for added flavor!
Cook More with these special Recipes:
Lions Mane Mushroom Recipe
Hi, I am Harry a food blogger. I like to experiment with recipes and love to share with you. A knack for turning everyday meals into extraordinary culinary adventures! From discovering hidden gems in local eateries to whipping up mouthwatering recipes at home, I share a love for all things delicious. Join my journey as they explore flavors, experiment with ingredients, and bring the joy of food to life, one bite at a time!” @mytyperecipes


